Creating a New Project
Last updated: 16 July 2026
Sign in to PlayServ Backoffice to start the onboarding flow. It covers two steps: setting up your studio and creating your first project.
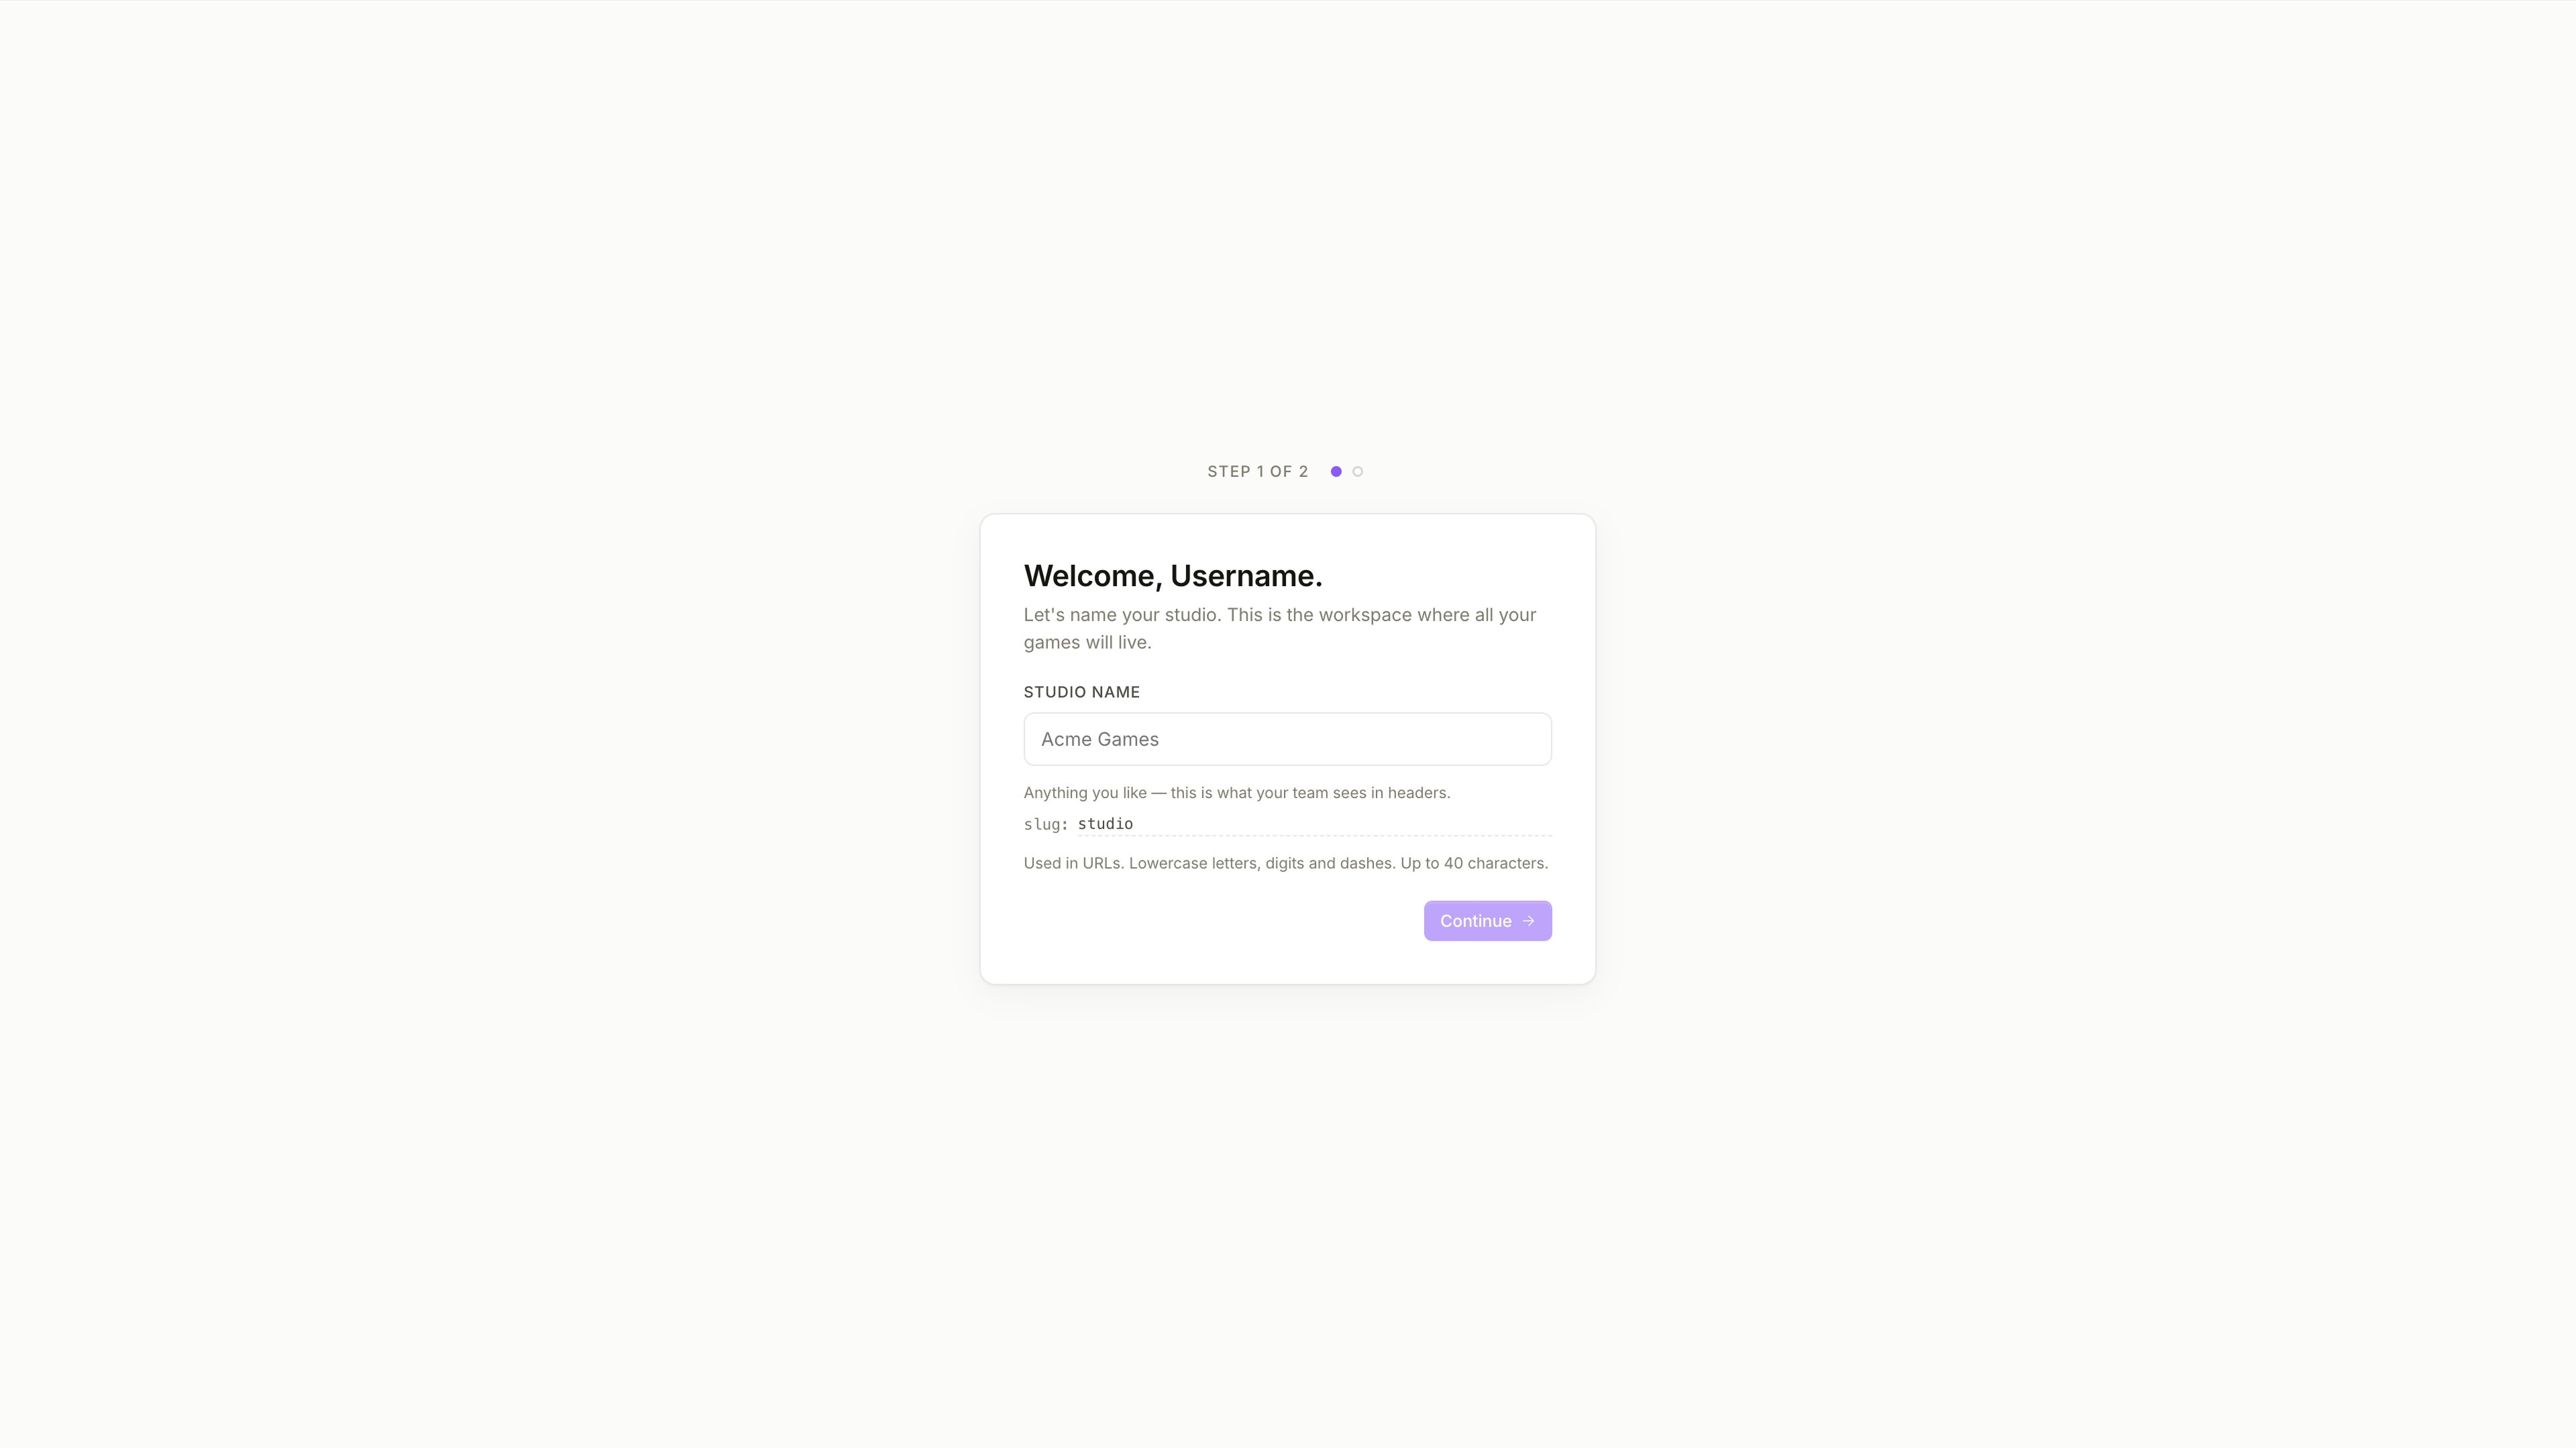
Name your studio
A studio is the top-level workspace in PlayServ. All projects live under it.
Enter a name in the Studio Name field and click Continue. The name appears in the header and project selector across the Backoffice.
A URL slug is generated automatically from the name — lowercase letters, digits, and dashes.
Create your first project
Select how to set up the project.
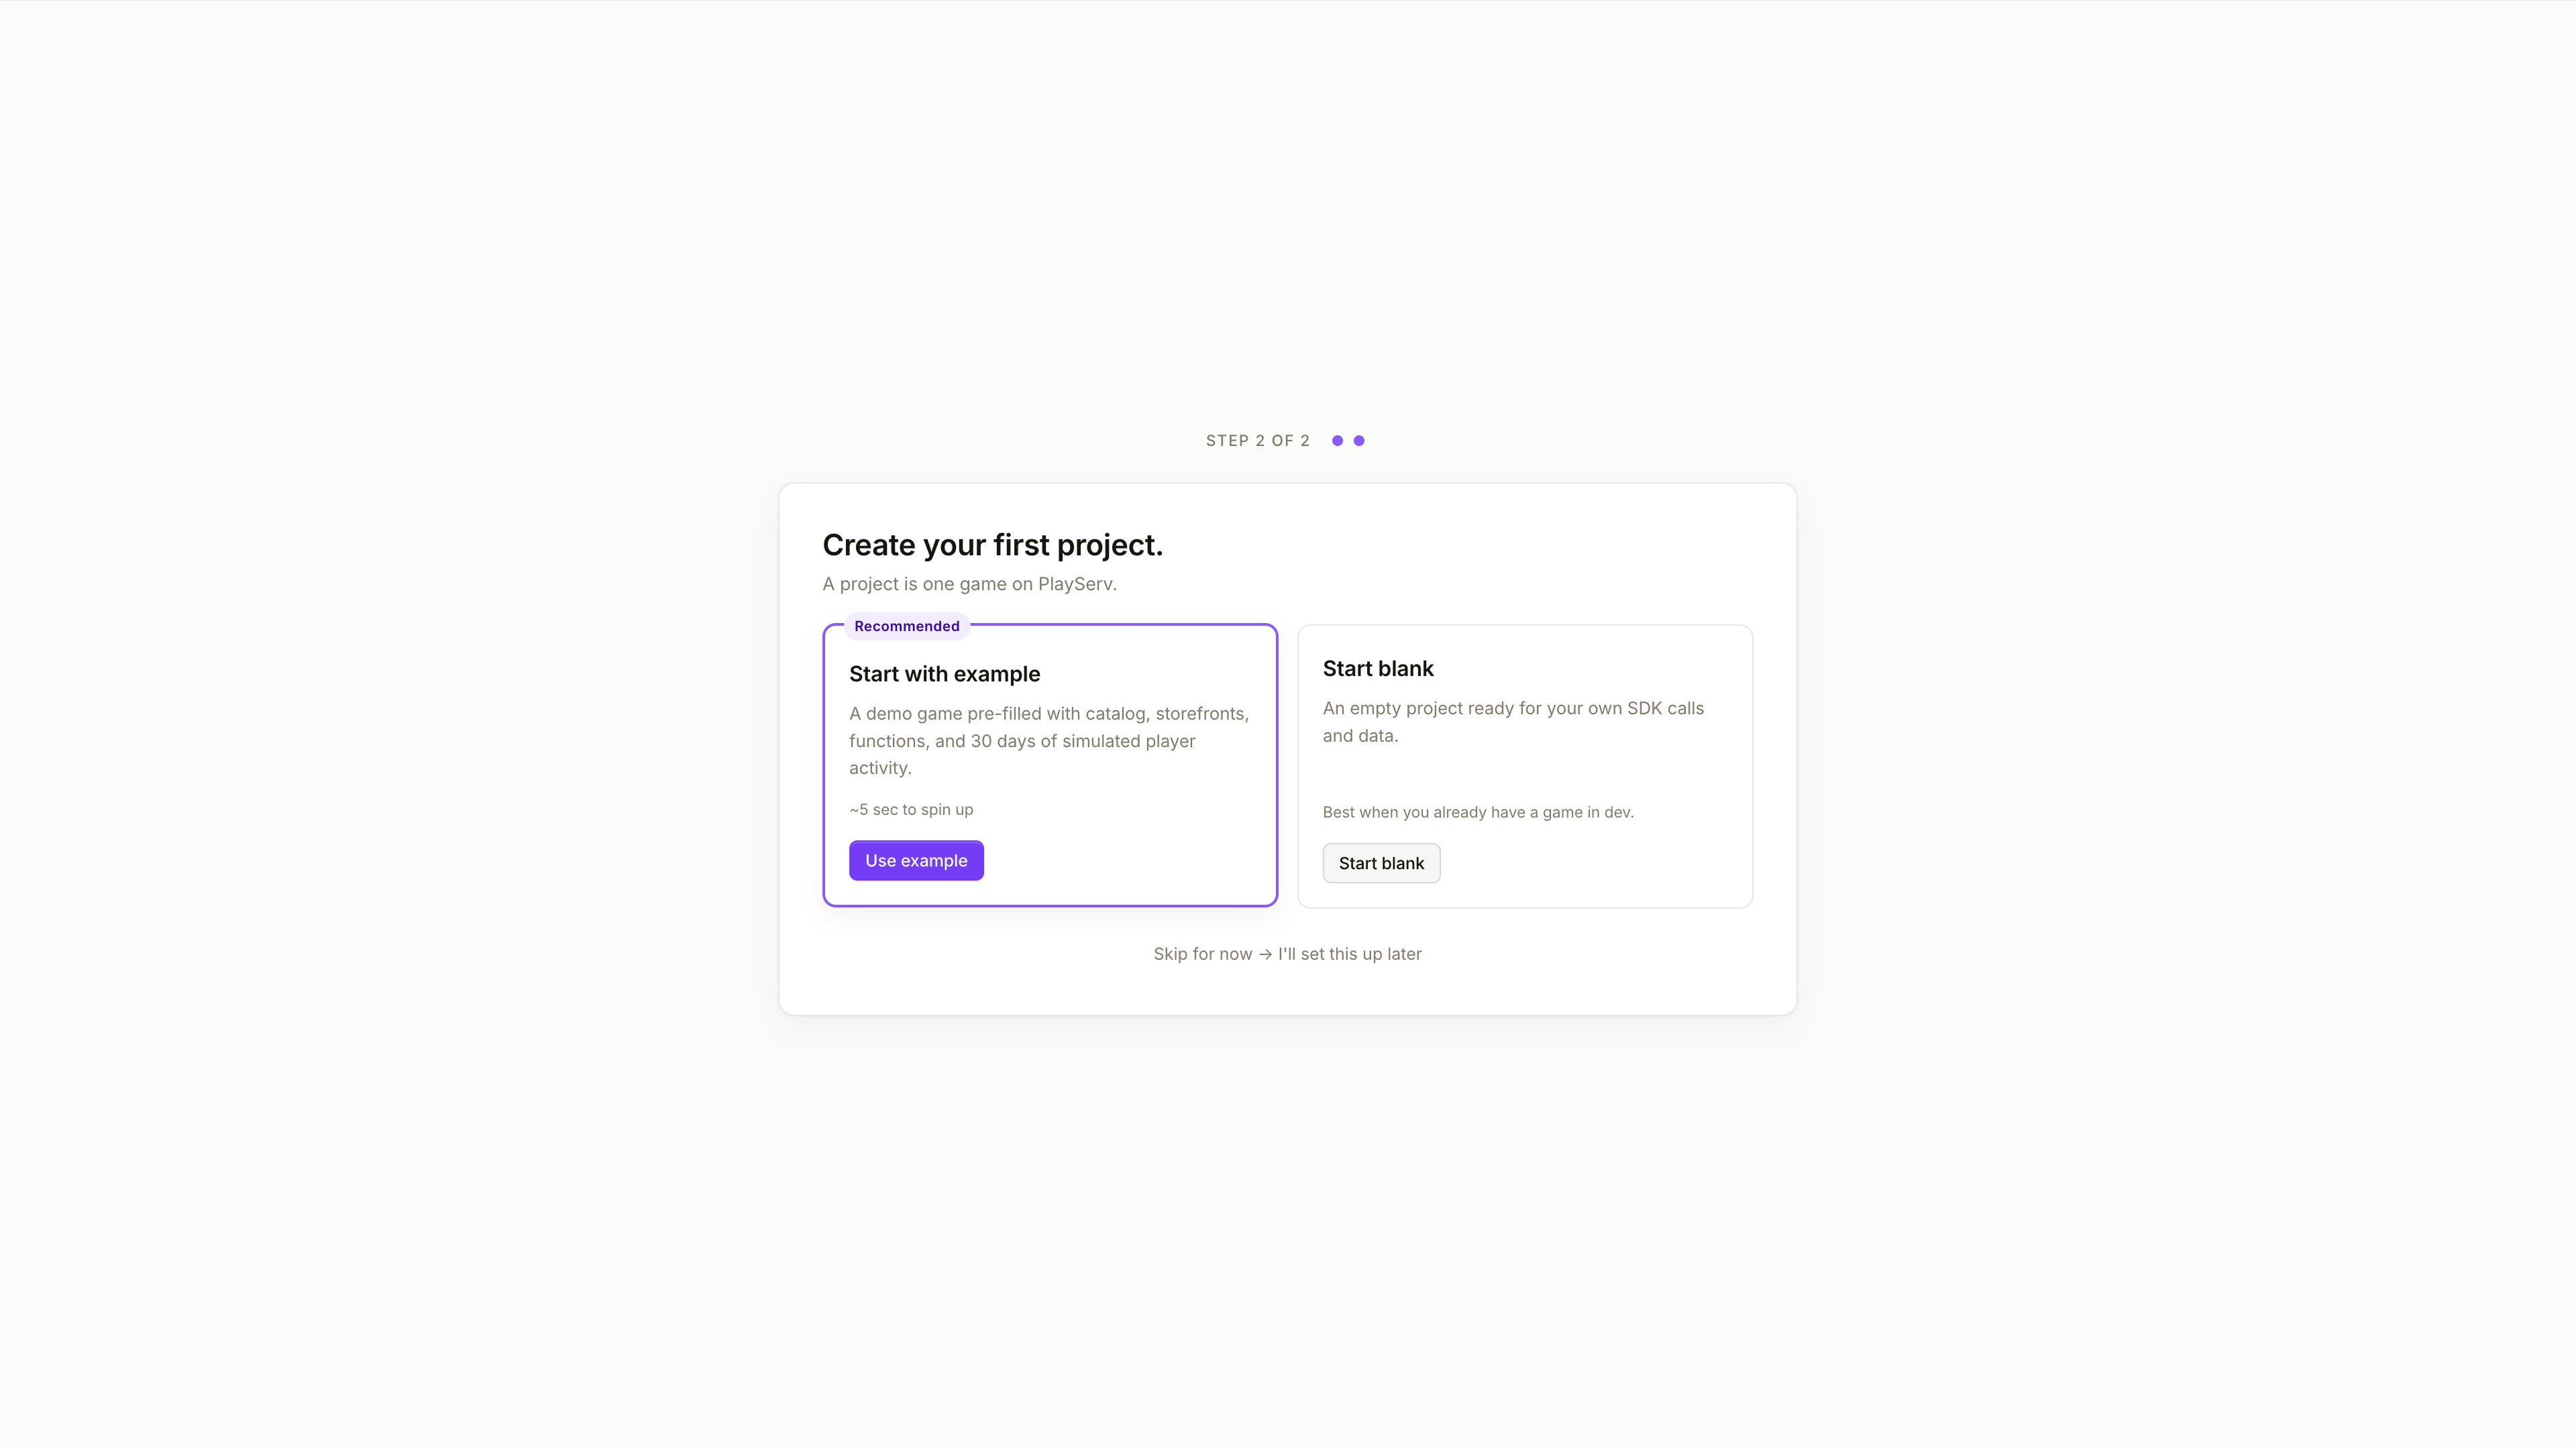
Start with example sets up a demo project pre-filled with a catalog, storefronts, functions, and 30 days of simulated player activity. Recommended if you want to explore PlayServ before connecting a real game.
Start blank creates an empty project ready for SDK integration. Use this when you already have a game in development.
To skip this step and return later, select Skip for now → I'll set this up later.
This guide covers the Start blank flow.
Configure project details
After selecting Start blank, fill in the project configuration.
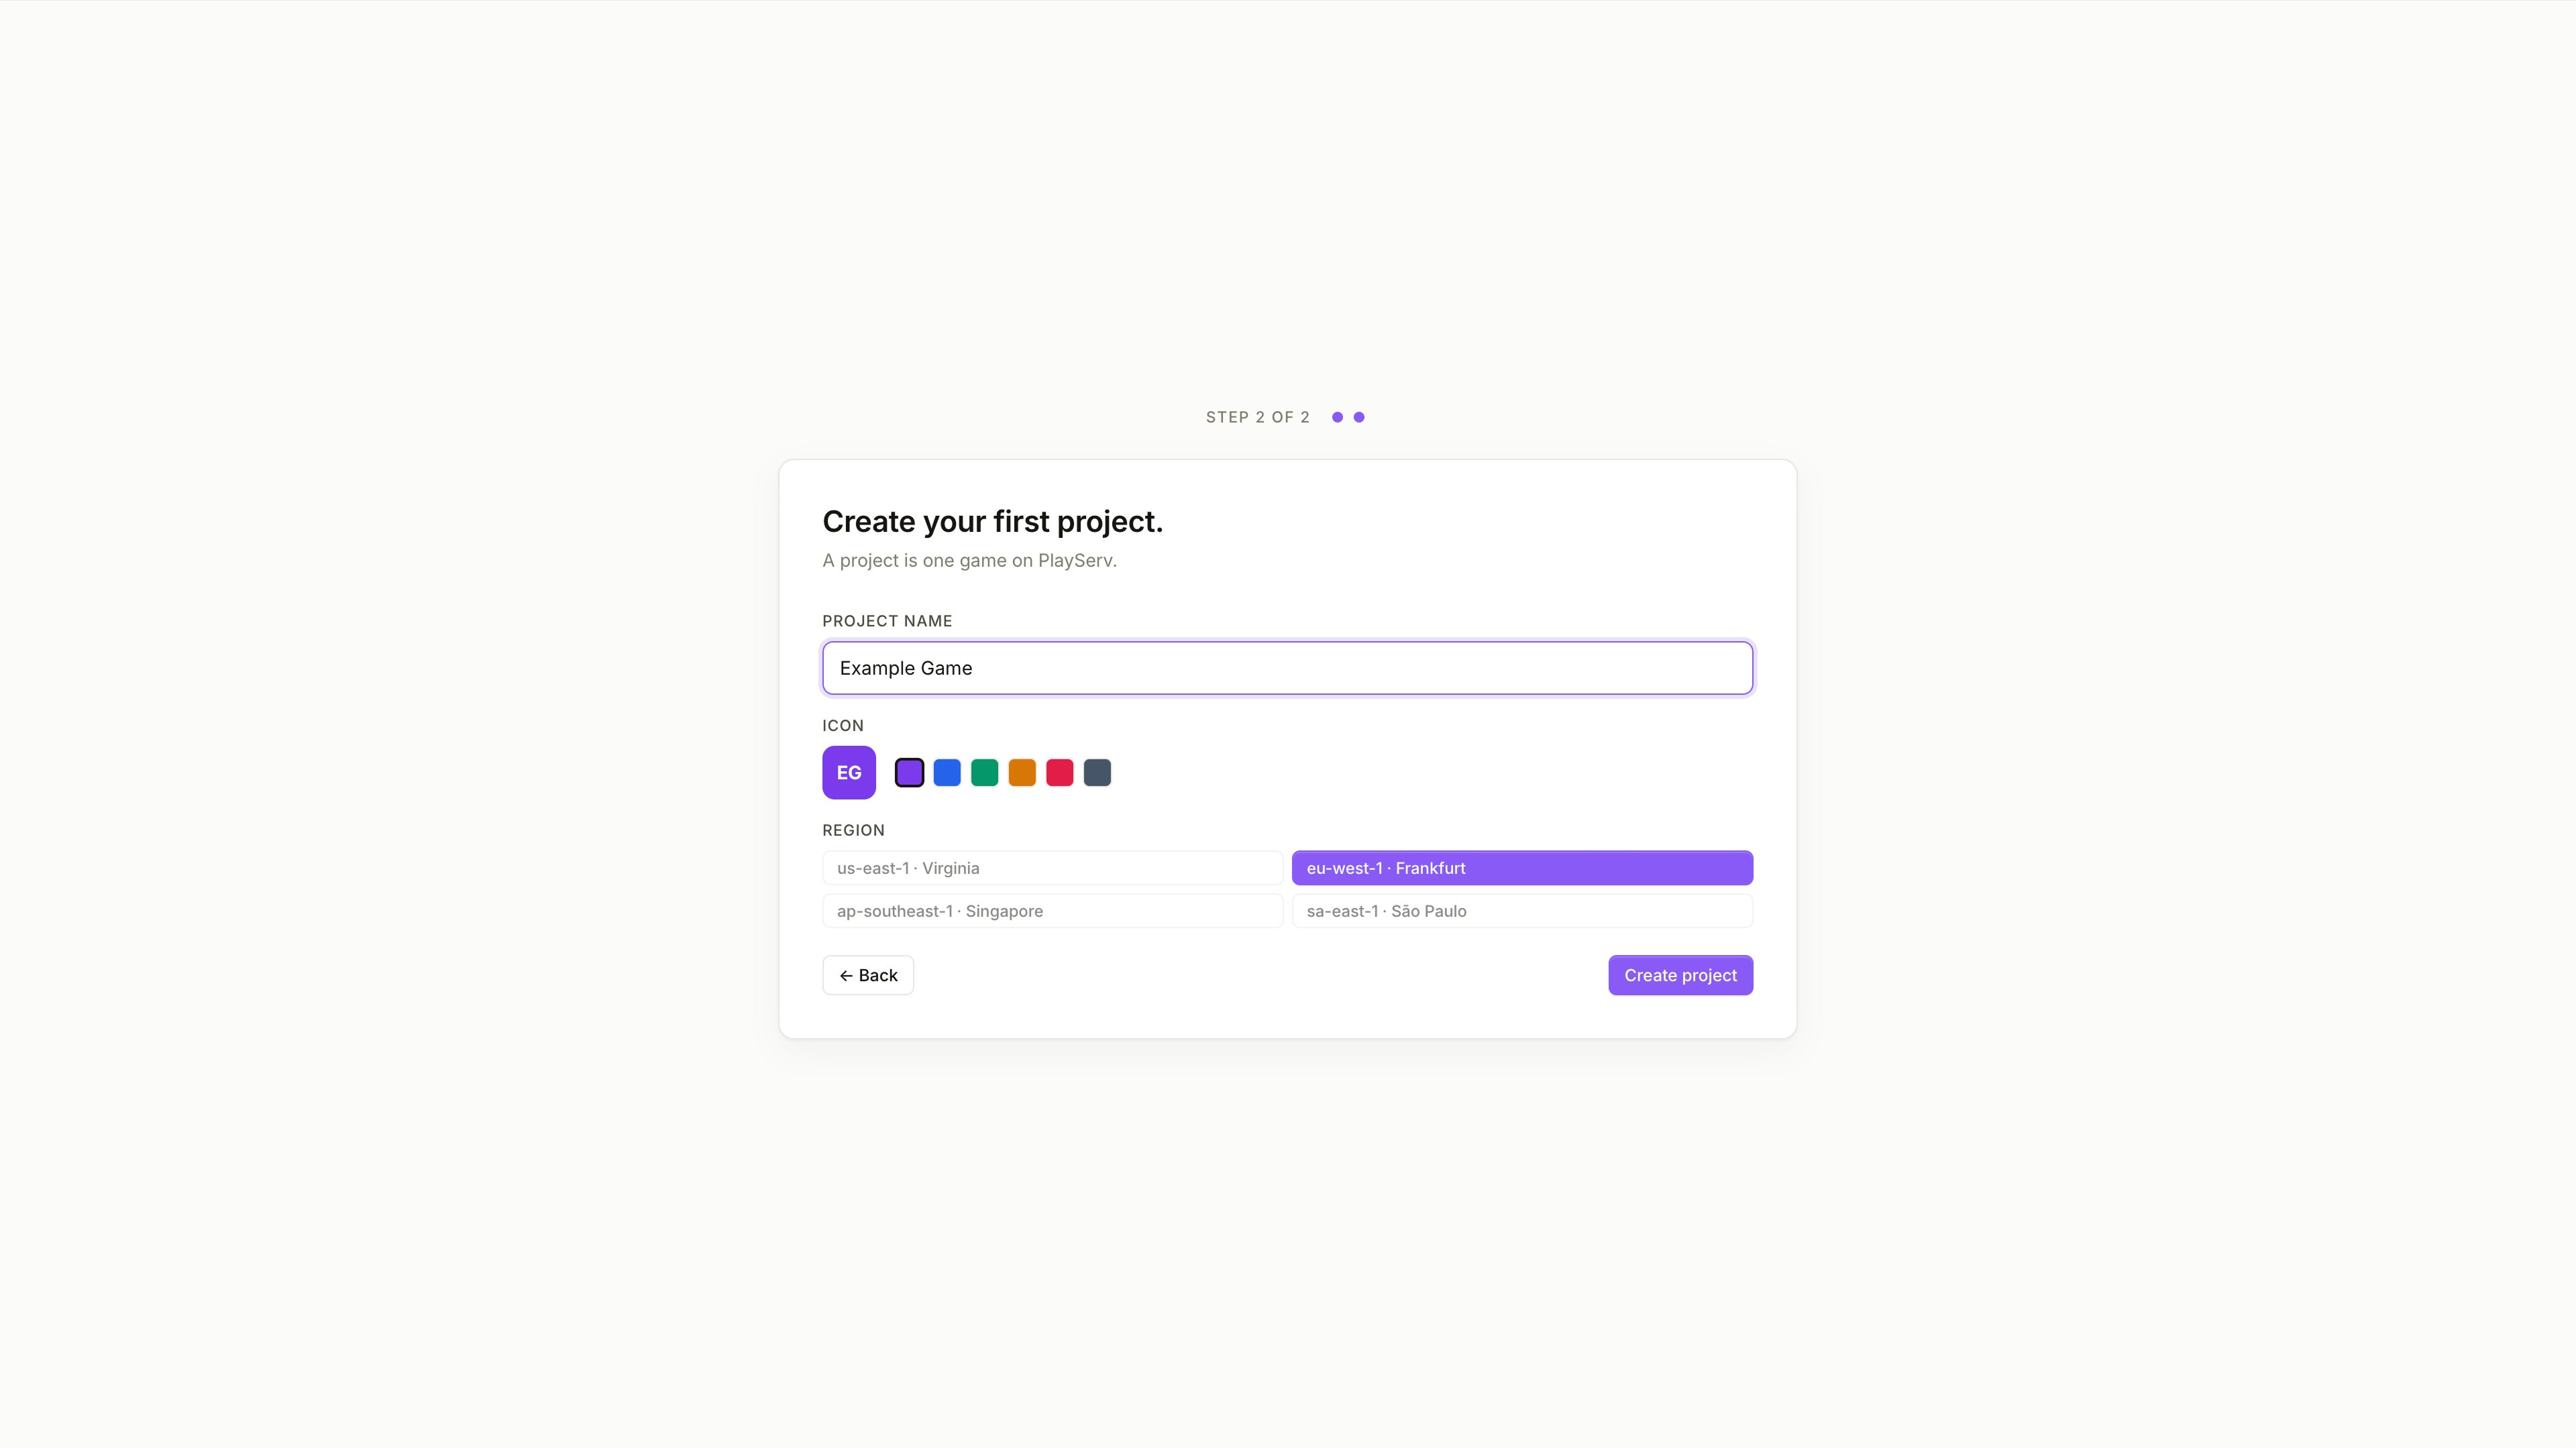
Project Name
The name used to identify the project in the Backoffice header and the project selector. It can be anything — you can rename it later.
A URL slug is generated automatically from the name. The slug is the primary identifier for the project and is used in three places:
- API URLs — all REST API calls are scoped to the project slug
- Unity SDK — the slug is passed during SDK initialisation to connect the client to the correct project
- MCP assistant — used to connect Claude to the project:
Access the project with a my-game slug
The slug appears under the project name in the Backoffice header.
Icon
A colour for the project icon, generated from the project name initials. Useful for distinguishing between projects at a glance in the project selector.
Region
The region where the project data will be hosted. Available options: us-east-1 · Virginia, eu-west-1 · Frankfurt, ap-southeast-1 · Singapore, sa-east-1 · São Paulo.
The region cannot be changed after the project is created. Choose the region closest to your players or backend infrastructure before proceeding.
Click Create project to finish.
Project dashboard
The Backoffice opens the project dashboard immediately after creation. From here:
- find the project slug in the header — used for MCP access and API calls
- use the Quick Start Panel for links to integration resources
- open SDK Keys to create your first credential
SDK keys are not generated automatically. You need to create one before proceeding with SDK integration.
Environments
A project runs in separate environments — typically dev and prod — each with its own data, schema, functions, and keys, so work in one never touches another. Most day-to-day work targets dev; you promote to prod when ready.
You can also create a new environment as a copy of an existing one, seeding it from another environment rather than starting empty. This is the way to stand up a fresh environment that already carries a known-good schema and data set. Because copying an environment duplicates its full data plane, the copy runs asynchronously — the new environment is created immediately and populated in the background.
An environment copy is a point-in-time snapshot of the source — later changes to the source do not flow into the copy. Keys are per-environment, so a copied environment needs its own SDK keys before the SDK can connect to it.
Next steps
- API Key Management — create the Development key needed for integration
- Connecting a Project to Unity — configure the SDK with your project credentials